My door is fine, but the latching mechanism in the microwave next to the control panel is broken. What I mean is the top opening (of the 2) in the microwave body that accepts the door latch has a broken part. The door will not open sometimes; when the door button is pushed, the bottom latch is pushed up by the release button but the top latch does not work. I am looking to replace the board latch, believing that is the problem. My question is how do I get to the latch board in the microwave to replace it? I have looked at Youtube videos but they don’t apply to my microwave. Any thoughts?
Hi.
Please explain more clearly what is the problem, which part is broken and what is it you call a “latch board”?
Simon.
The latch board is a long plastic piece that goes next to the control panel and the door latches (both) go into the opening where the latch board is used to open the door when the door button is pushed. The top part of the latch board must be broken, as it is not visible when the door is open and does not push up when you push the door button. Hope that explains it better. My problem originated from not being able to open the door consistently. You can see the latch board diagram on this website when you look at the microwave internal diagram.
Thanks,
Stephen
Hi.
Check, please latch #1006, button #1613, release lever#2006.
Here are the breakdown diagram and Microwave parts for GE JE1860SB003 - AppliancePartsPros.com
Simon.
Part # 4001 (in the diagram above) is being replaced, need to know how to get inside microwave to replace it. I guess being able to remove the control panel will allow me to do the same thing. Any thoughts?
Hi.
You need to remove the cover and control panel (one screw on the top of the panel from inside).
Simon.
Simon, do you mean I can access the control panel screw after I remove the one piece cover that goes over the top and sides?
Stephen
You are absolutely right.
Simon.
Thanks, Simon, will do that once part gets here.
You are welcome.
Simon.
Dear APP Team,
Last year I replaced the faulty Primary Interlock (top) micro switch, its gone bad again. I need to pull out the latch board as it needs replacement as well. I removed the 2 screws but the latch board is stuck between various plastic prongs and wouldn’t come out unless I open more stuff. Need help to handle this strange design.![]()
Hi.
Looks like you need to remove the control panel first (#923 on the diagram), one screw on top from inside.Then remove the lever (#2006) and the latch board.
Here is the breakdown diagram and Microwave parts for GE PEB1590SM1SS - AppliancePartsPros.com
Simon.
Simon / APP Team
Thanks for the response.
I did remove the latch board by loosing the top screw for the adjoining fan and breaking some of the plastic prongs.
Removing the Control Panel 923, is not likely to help since the latch board is screwed on to steel panel 281 and then stuck between the panel and the adjoining fan.
I have received the new parts and want to install it back without breaking any thing. Appreciate your quick response on this.
Thanks
Hi.
What I can tell you from the diagram is that removing the control panel first wil allow you to remove the lever, holding the latch board.
Simon.
Simon
Thanks a lot. Removed the control panel #923 (FYI, it has one screw at the bottom as well). I have installed the new latch board, micro switch etc.
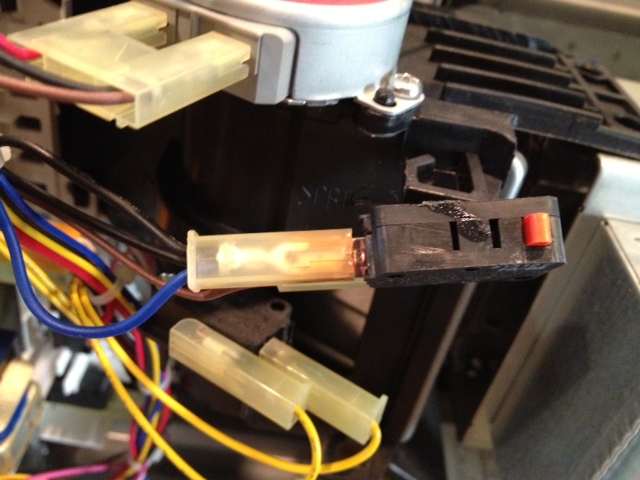
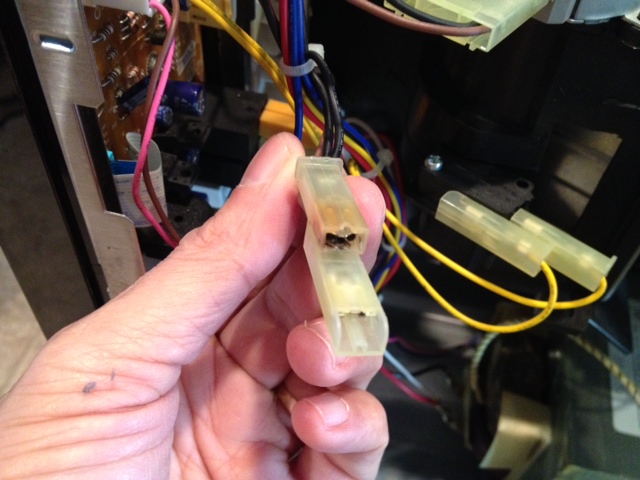
Just one quick question, one of the connector to the top micro switch (the one that got busted second time) shows burning signs. Although it still hold well to the micro switch connectors. Do I need to replace this?
See the attached pics.
Thanks a lot.
Hi.
I highly recommend you to replace this conector.That could be the reason why the switch goes bad.
Simon.
Hi Simon / APP Team
Thanks for the response. Agree with your recommendation.
I removed the damaged insulated 2-wire female connector, however I am not able to find the similar 2-Wire Insulated connector here. What’s the part number for these so I can order these with APP.
Also will appreciate some instruction on installation of this 2 Wire female connector.
Thanks
Hi.
You don’t need to replace the entire connector. Use the side cutters to cut off the bad one and replace it with regular crimp on connector.
Simon.
Hi Simon
Sorry couldn’t get back earlier. Thanks for your below response.
I see the regular crimp on connectors don’t fit well.
I think I may end up replacing the entire connector bunch. What’s the part nbr for that to order.
Thanks
Hi.
I don’t think they are sold as a separate parts from the manufacture. I have used the regular connectors many times without any problems in the past.
Simon.