Please make sure to click on General above and select the correct appliance type first.
Brand: Bosch Dishwasher Model Number: SHXM78Z55N/18 Main Symptom: E19 Error What happens & when: E19 error immediately after staring cycle. History: Error occured a few times. Reset machine by unplugging and then could run a cycle. On one those the dispener did not open. Replaced depenser. Run normal cycle. Cycyle started, wash cycle started then e19 error occurred. Water did not drain. Now everytime I try running it I immediately get the E19 error.
Error Code (if any): E19
Parts or tests already tried: Changed dispenser
Photos / video link:
The E19 error code on your Bosch SHXM78Z55N/18 dishwasher indicates a fault with an internal valve (often the heat exchanger outlet valve) or the detergent dispenser circuit. This safety fault prevents the appliance from running to protect electrical components from potential leaks or short circuits. [1, 2, 3, 4, 5]
Initial Troubleshooting
Sometimes, temporary circuit glitches can cause the E19 code. Try a hard reset:
Turn off the dishwasher using the power button, or unplug it from the wall (if accessible).
If the error returns, it points to a physical hardware failure rather than a minor glitch. The primary culprits typically include:
Heat Exchanger Outlet Valve: This is the most common cause. The valve often fails electrically (bad coil) or leaks water into the base of the unit. Replacing this valve usually resolves the issue.
Detergent Dispenser Solenoid: A fault in the circuit that operates the door that releases your soap.
Control Board / Wiring: A burnt circuit on the main control board or a disconnected/damaged wire.
I have included the section from the technical manual on how to perform system tests
This issue can be caused by a faulty inlet valve or a problem with the actuator loop inside the detergent dispenser door. The wiring to the actuator could be melted or damaged.
I would start by testing the inlet valve with a meter to see if it’s staying open when it shouldn’t. If the valve checks out, move on to testing the detergent dispenser assembly.
If the error code appears immediately, it’s possible one of those components is triggering a safety response from the control board. There’s also a chance the control board itself has been damaged and is causing the issue.
Thanks. I follow the directions and got into test mode. Unfortunately, I only have p1-p7. Pressing c to start doesn’t do anything. As mention I do have the E19 error code.
Thanks. The machine ran (after trying in about 20 times. The water enters, the heatrer worked, the wash cycle worked. However, at end (?) of wash part of cycle and before rinse part the E19 error occur. Machine stopped and did not drain. However, I was able to drain by doing a forced drain. Not sure how to test inlet valve. I know how to use meter but do not know when it should be on. It does appear to let in enough water for the wash cycle.
Thanks. I follow the directions and got into test mode. Unfortunately, I only have p1-p7. Pressing c to start doesn’t do anything. As mention I do have the E19 error code.
Lookat at the parts diagram and the actual machine it does not appear I have a Heat exchanger valve. I have many video that show this part but my model is not one of them.
My model does not appear to have the heat exhanger valve.
Detergent dispenser assembly and its actuator/solenoid
Remove the inner door panel.
Locate the rear of the dispenser.
Disconnect the two-wire connector.
Measure resistance directly across the actuator terminals.
Door wiring harness
Bosch door harnesses can break where the harness flexes.
Check for damaged or partially broken conductors between the control module and dispenser.
Control board output
If the dispenser coil measures normally and wiring is intact, the control module becomes suspect.
As for the resistance value, I would trust the few-hundred-ohm measurement range for the dispenser actuator far more than the 7–10 kΩ specification. The 7–10 kΩ range is characteristic of some valve coils, not the dispenser actuator used in these door assemblies.
What resistance did you actually measure across the dispenser terminals?
OL / infinite → failed actuator coil.
0–10 Ω → shorted actuator coil.
~300–400 Ω (or similar stable value) → coil is probably good, and I’d start looking hard at the wiring harness and control board.
The orginal coil measure 2.1K Ohms. I have not measured the replace part yet. Since the machine is showing the E19 for both parts. Can I assume that the physical depenser is ruled out? Note the one time the machine ran, the depenser did open).
I still need to inspect the wires. However, there doesn’t seem any flex points between the sepenser and the control module. I can try to check for continuity at eac end of the connector.
How does the inlet come into play? The valve works since the machine does fill with water.
Youumention the control module is next. How can I check this?
Is the power module a suspect?
As for the water inlet, since it works is that still something that needs checking?
Sometimes on these Bosch dishwashers, the valve can get stuck open or fail electrically and trigger an E19 error because the control board detects an abnormal condition and interprets it as a safety issue. The same can happen with the detergent dispenser actuator.
If the valve and dispenser both test good, I would move on to checking the control board. Inspect it carefully for any signs of corrosion, burnt components, damaged traces, or overheated connectors.
Using a multimeter, verify that the board is sending the correct voltage to the valve or dispenser when it is commanded to operate. If all of the related components and wiring check out, but the board is not supplying the proper voltage, then the control board may be faulty.
Thanks. I can’t get the machine to run at all excapt for the forced drain so I cant’t check the output voltage. Your other suggestion are extremely helpful. I am williing to order a new control board to try after following your suggestion. Does it requiring programming. I am just hoping not to do that and find out the power module was the issue.
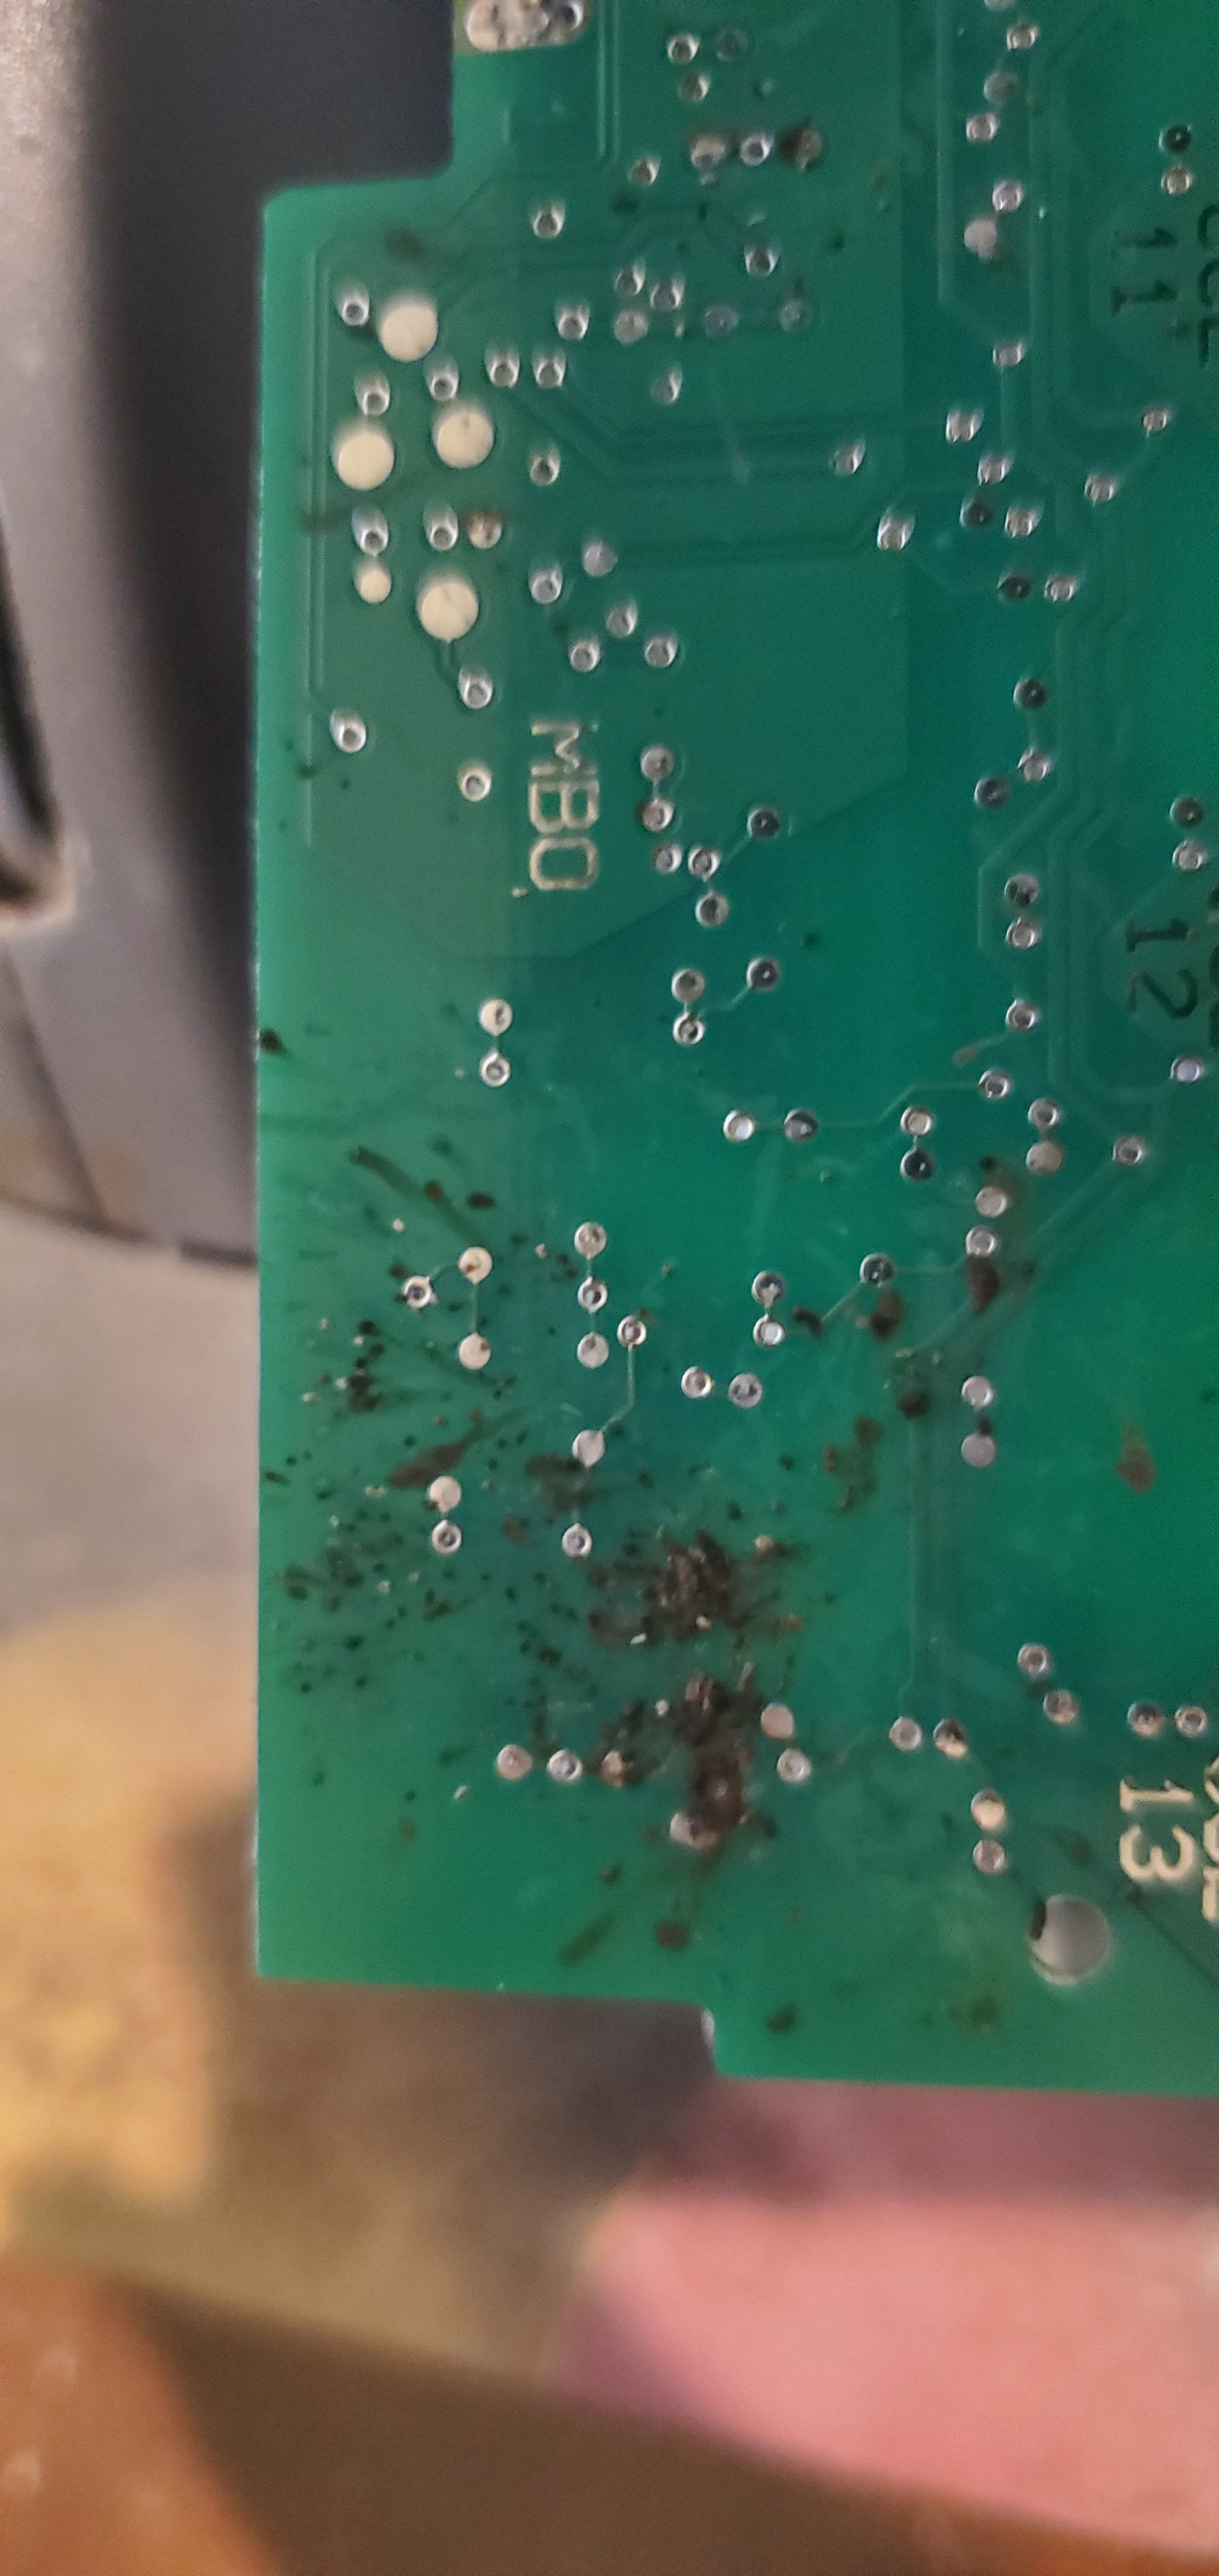
I did notice a lot of what i am guesssing was bug debri on the outside of control module. So that could be a clue.
My thinking is that all the other componenbts are getting power so hopefully the power module is good.
I am assume this was some sort of insert shit maybe. Cleaned the board with Isopropul alcohol. No visual damage to board, components or traces. Started a quick wask cycle. Machine ran for about 30 minutes before e19 error. Ran a full cycle (normally 2:55) and machine ran for 18 minutes before e19 error. The depenser did open but the machine did not drain.
Now any cycyle immediately causes an e19 error. Unplugging power makes no difference.
Will a new control fix this? Any reason to suspect the power module? Everything (inlet vavle, circulataion pump, drain pump, dispenser, control panel gets power.
What part actual controls the sequence of each part. The control panel or the power module.
Just to be clear. The control board is the board on top machine below the cycle bottons.It did clean up but still getting error. Looks like that to the next thing to try. So this board has the brains to troubleshoot the machine as well as the timing sequence of operations. Does it come preprogrammed?