Rank: Member
Groups: Registered
Joined: 12/16/2010(UTC)
Posts: 12
|
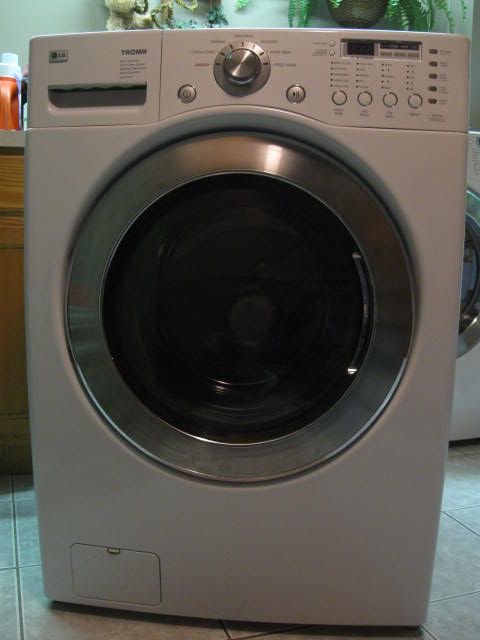
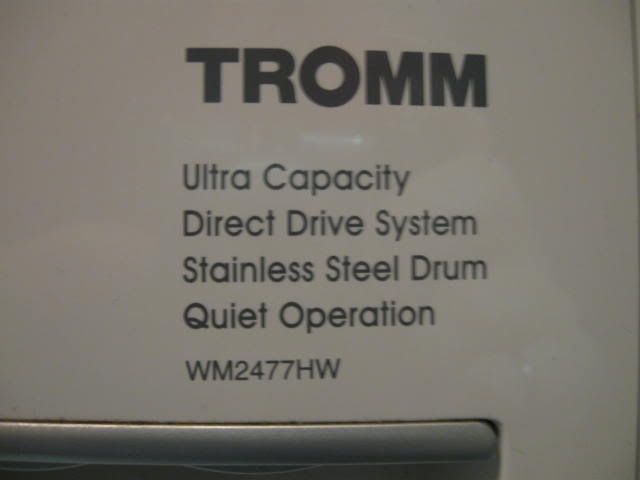
Model: LG Tromm WH2477HWAge of Machine: approx. 4 yearsSymptoms: Water remains in the drum after a wash cycle.Problem: The drain pump was sluggish due to sediment build up inside the pump.Drain Motor: Part number: 4681EA2001D

  Let's Get Started! Let's Get Started! 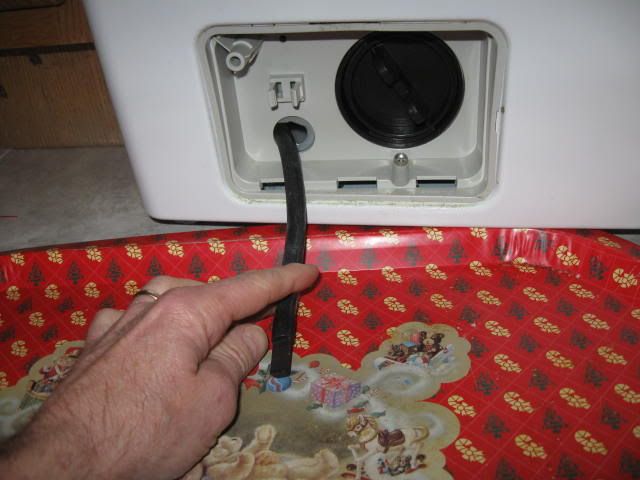 1. Unplug the washer and shut off the water supply lines. Remove the drain access cover, pull the drain hose out, pull the plug out of the end of the hose and drain the tub. In my case, the hose was plugged with debris, so I had to partially screw open the strainer to drain the water out one tray at a time. 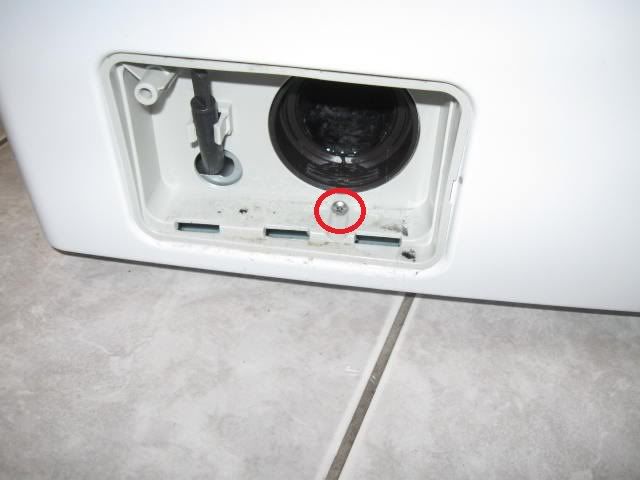 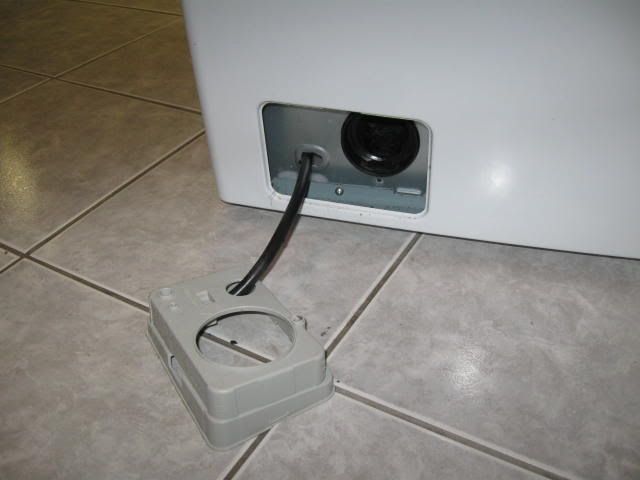 2. Remove the strainer and clean out all debris. Remove the Philips screws circled in red. Keep track of which screws go where. The screws on this machine are all different lengths. Pull the drain cover away from the machine. 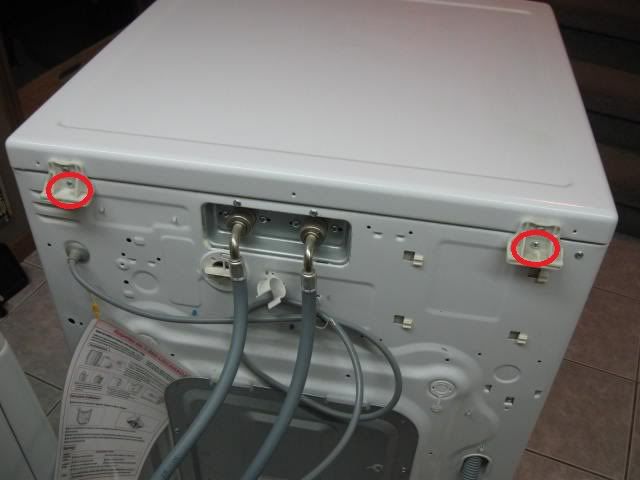 3. Remove the two Philips screws circled in red. Keep track of which screws go where. The screws on this machine are all different lengths. 3. Remove the two Philips screws circled in red. Keep track of which screws go where. The screws on this machine are all different lengths. 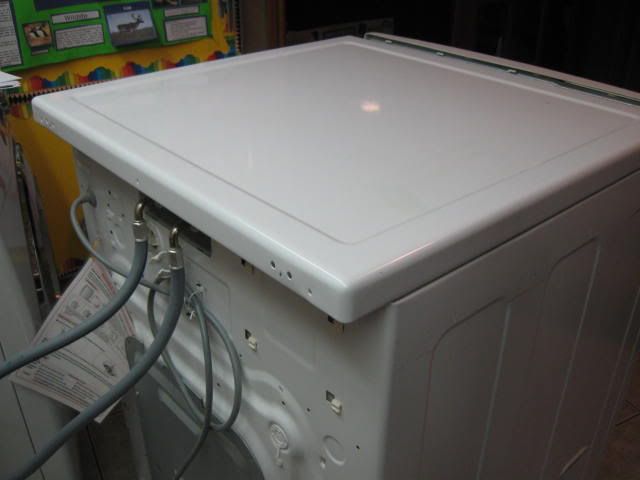  4. Slide the top cover toward the back of the machine. I found it necessary to hit the cover with the palm of my hand to get it to move back. Remove the top cover and set aside. 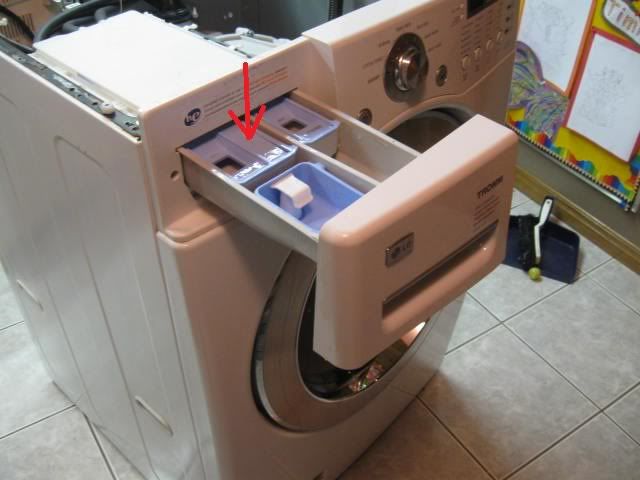 5. Remove the detergent drawer by pressing down on the light blue latch (red arrow) and pulling the drawer from the machine. 5. Remove the detergent drawer by pressing down on the light blue latch (red arrow) and pulling the drawer from the machine.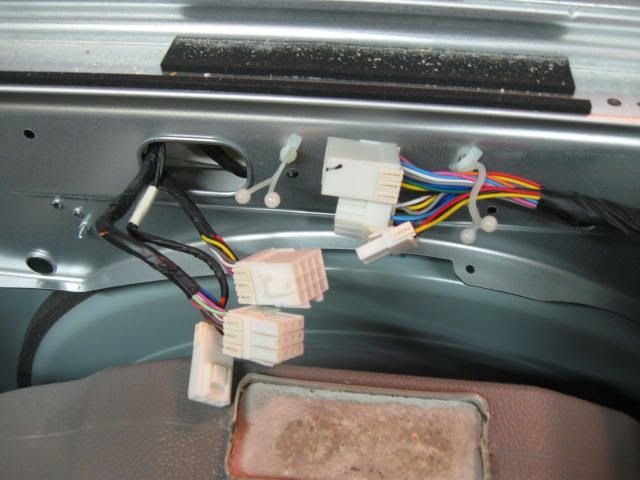 6. Disconnect the three wiring harness connectors at the front of the machine by pushing down on the latch and pulling apart. 6. Disconnect the three wiring harness connectors at the front of the machine by pushing down on the latch and pulling apart.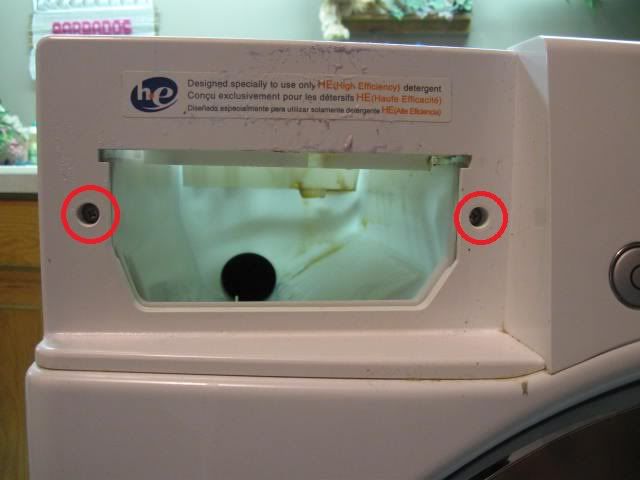 7. Remove two Philips screws circles in red. These screws are stainless steel. Don’t mix them up with the other ones. 7. Remove two Philips screws circles in red. These screws are stainless steel. Don’t mix them up with the other ones.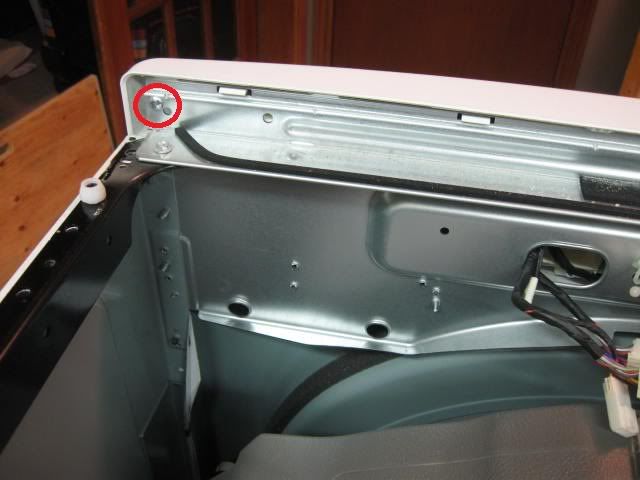 8. Remove the Philips screw circles in red. 8. Remove the Philips screw circles in red.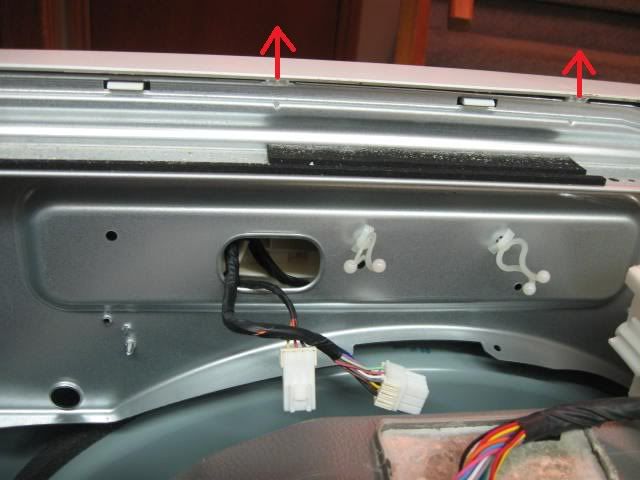 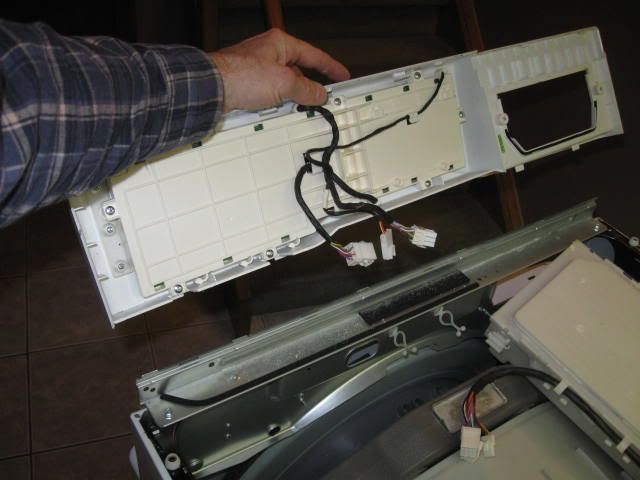 9.Lift the front plastic cover up at the two places (where the red arrows are shown) and remove the front control panel. Set the control panel aside. 9.Lift the front plastic cover up at the two places (where the red arrows are shown) and remove the front control panel. Set the control panel aside.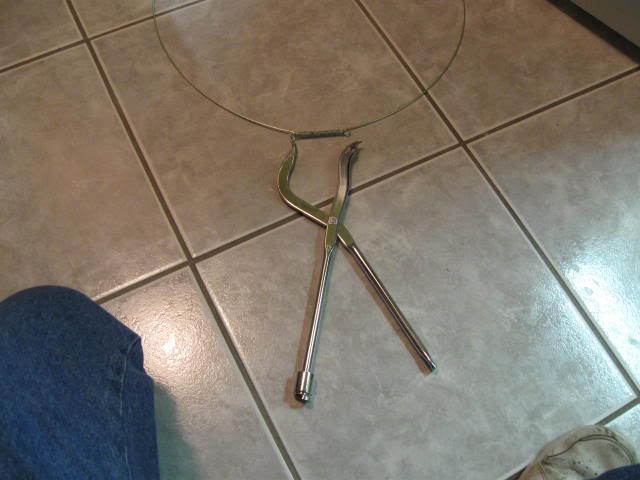  10. Open the front door and remove gasket retaining spring. In order to do this you will need to stretch the spring with a large pair of snap ring pliers or in my case, I modified a cheap pair of $7 brake spring pliers that I picked up a Princess Auto. 10. Open the front door and remove gasket retaining spring. In order to do this you will need to stretch the spring with a large pair of snap ring pliers or in my case, I modified a cheap pair of $7 brake spring pliers that I picked up a Princess Auto.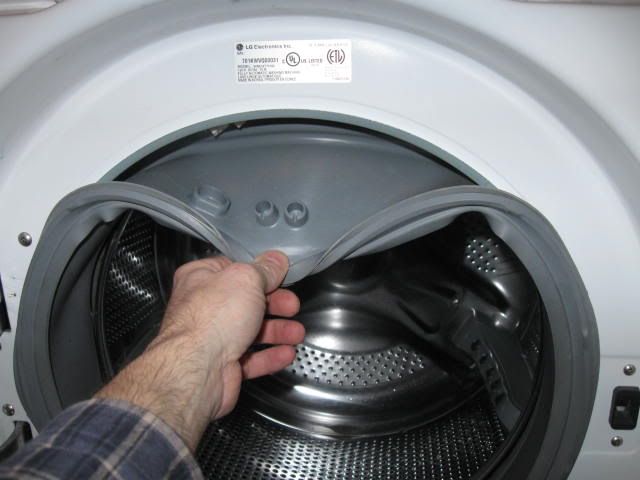 11. Pull the rubber door gasket away from the front sheet metal opening. 11. Pull the rubber door gasket away from the front sheet metal opening. 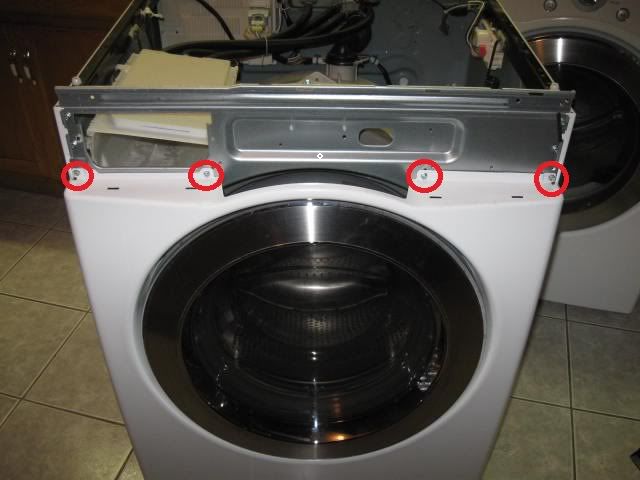 12. Remove 4 Philips screws (circled in red). Tilt the front cover forward to access the door switch. 12. Remove 4 Philips screws (circled in red). Tilt the front cover forward to access the door switch.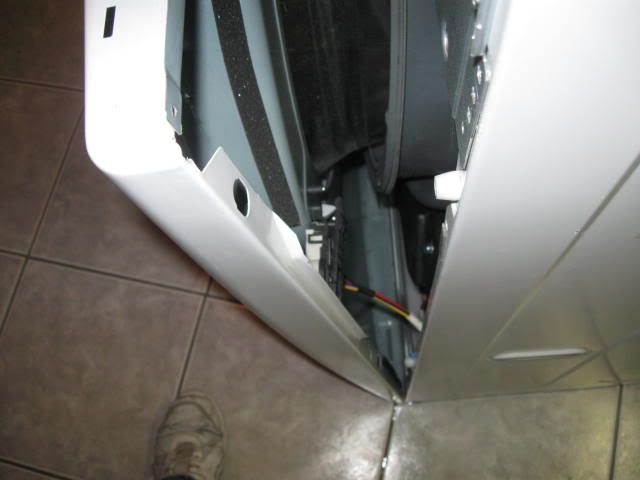 13. Disconnect the wiring harness connector at the door switch. 13. Disconnect the wiring harness connector at the door switch.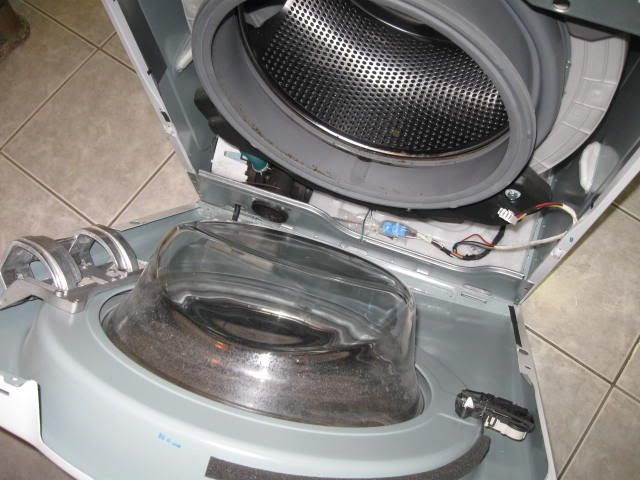 14. Remove the front cover with door and set aside. 14. Remove the front cover with door and set aside.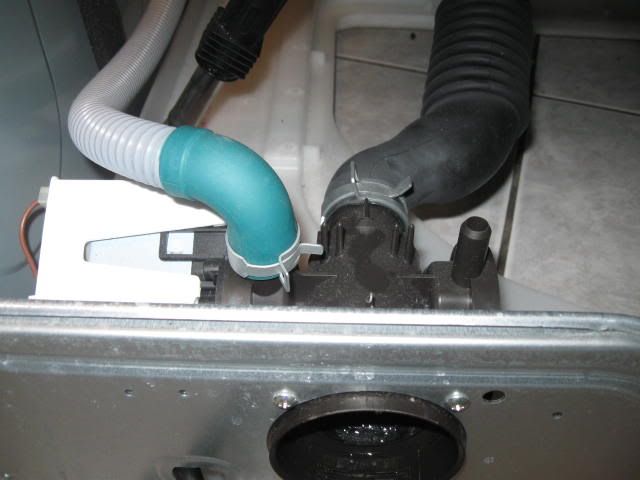  15. Pinch the hose clamps and remove them. Pull the two hoses off of the pump casing. Remove the two Philips screws circled in red. 15. Pinch the hose clamps and remove them. Pull the two hoses off of the pump casing. Remove the two Philips screws circled in red. 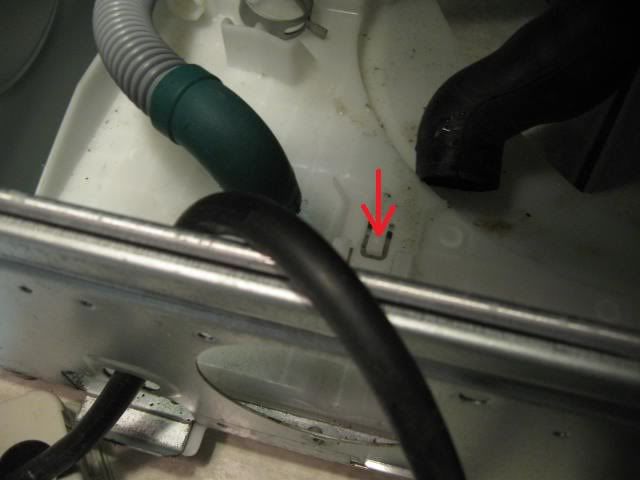 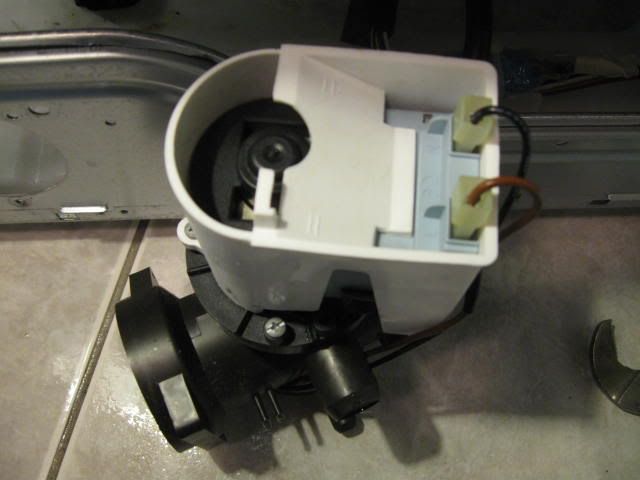 16. Push down on the plastic tab to release the latch that holds the pump to the base (you can’t actually see this tab, you just have to “feel” for it), then slide the pump back into the machine to remove it. Disconnect the electrical wires. Brown = LINE. Black = NEUTRAL. 16. Push down on the plastic tab to release the latch that holds the pump to the base (you can’t actually see this tab, you just have to “feel” for it), then slide the pump back into the machine to remove it. Disconnect the electrical wires. Brown = LINE. Black = NEUTRAL. 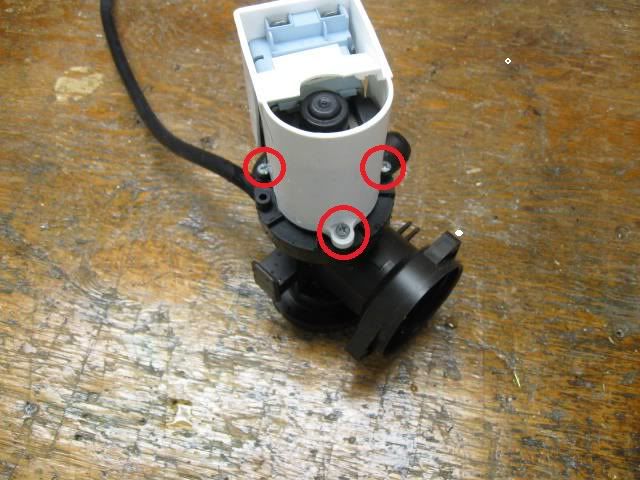 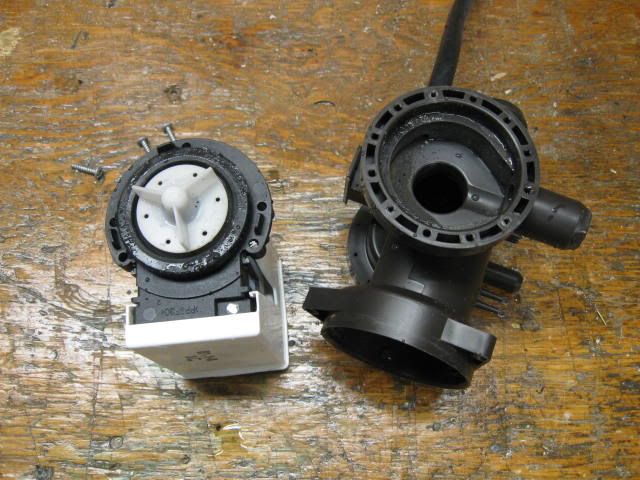 17. Remove the three Philips screws (circled in red) and separate the pump motor from the pump casing. There are more than 3 holes on the pump casing. Make a mental note which holes the screws came from. 17. Remove the three Philips screws (circled in red) and separate the pump motor from the pump casing. There are more than 3 holes on the pump casing. Make a mental note which holes the screws came from. 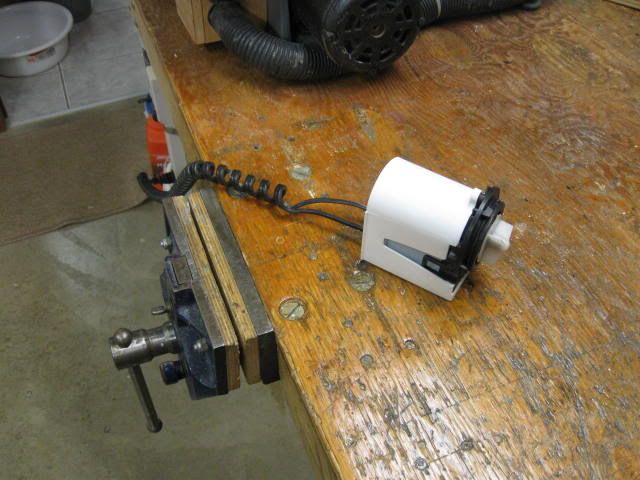 18. Clean the casing out with hot water and an old toothbrush. Using an ohmmeter, check that the resistance across the motor terminals measures between 10-20 ohms. If the resistance is outside this range, replace the motor. Mine measured 13 ohms. Bench test the motor with 110VAC to ensure that the motor runs. Mine worked OK.19.Using compressed air, I blew out the obstruction in the small rubber drain hose. There was an accumulation of grit and sediment in my hose. 20. Next, I connected compressed air to the green rubber boot that was formerly connect, d to the drain pump and blew air through it to ensure that the hose was not blocked. Mine was not blocked. 21.Next, I temporarily connected the front control panel, the door switch and the reassembled drain pump back up to the washing machine and temporarily ran the machine though a QC test mode by following the instructions found on page 16 of the service manual found at this link. https://docs.google.com/fileview?id=0B5If-wTgYWH5MzYzYzAzNGQtMmNiNy00ZmFiLWI5NGQtODg0YTgzYTU5MzJk&hl=en 18. Clean the casing out with hot water and an old toothbrush. Using an ohmmeter, check that the resistance across the motor terminals measures between 10-20 ohms. If the resistance is outside this range, replace the motor. Mine measured 13 ohms. Bench test the motor with 110VAC to ensure that the motor runs. Mine worked OK.19.Using compressed air, I blew out the obstruction in the small rubber drain hose. There was an accumulation of grit and sediment in my hose. 20. Next, I connected compressed air to the green rubber boot that was formerly connect, d to the drain pump and blew air through it to ensure that the hose was not blocked. Mine was not blocked. 21.Next, I temporarily connected the front control panel, the door switch and the reassembled drain pump back up to the washing machine and temporarily ran the machine though a QC test mode by following the instructions found on page 16 of the service manual found at this link. https://docs.google.com/fileview?id=0B5If-wTgYWH5MzYzYzAzNGQtMmNiNy00ZmFiLWI5NGQtODg0YTgzYTU5MzJk&hl=en
At steps 1,2,3, and 11, the drain pump ran and I measured 110VAC across the motor terminals. This gave me the confidence to know that the problem was solved.
22. Reassemble the machine in the reverse order and test by running the washer through one complete cycle.
|
|
|
|
|
|
Rank: Member
Groups: Registered
Joined: 4/23/2011(UTC)
Posts: 3
|
|
|
|
|
|
|
Rank: Member
Groups: Registered
Joined: 9/4/2010(UTC)
Posts: 3
|
This could not have been any more helpful!! Awesome pics and tutorial!
Thank you!:)
|
|
|
|
|
|
Rank: Member
Groups: Registered
Joined: 9/13/2011(UTC)
Posts: 1
|
This guide probably saved me 2 weeks of downtime, and almost certainly $200+. Instead, one $45 pump motor and overnight shipping and my family is back in business!
THANK YOU for taking the time to put this together. WOW! Thank you so much!!!
|
|
|
|
|
|
Rank: Member
Groups: Registered
Joined: 11/14/2011(UTC)
Posts: 1
|
Just finished replacing both the water pump and door seal with your instructions. They were incredibly easy to follow and saved me a bunch of money. We greatly appreciate your expertise and step-by-step procedure. You made a novice into a simi-pro.
|
|
|
|
|
|
Rank: Member
Groups: Registered
Joined: 12/16/2010(UTC)
Posts: 12
|
Originally Posted by: caffeineme  This guide probably saved me 2 weeks of downtime, and almost certainly $200+. Instead, one $45 pump motor and overnight shipping and my family is back in business!
THANK YOU for taking the time to put this together. WOW! Thank you so much!!! Thanks for the feedback. I am glad to hear that the procedure saved you time and money. It makes the time I spent taking the pictures and documenting the procedure all worthwhile! Don
|
|
|
|
|
|
Rank: Member
Groups: Registered
Joined: 12/16/2010(UTC)
Posts: 12
|
Originally Posted by: koko2yumyum Just finished replacing both the water pump and door seal with your instructions. They were incredibly easy to follow and saved me a bunch of money. We greatly appreciate your expertise and step-by-step procedure. You made a novice into a simi-pro. Thanks for the kind words and positive feedback. Glad that you found the procedure helpful.
|
|
|
|
|
|
Rank: Member
Groups: Registered
Joined: 4/24/2012(UTC)
Posts: 1
|
Thanks, really helpful tutorial!
I'm taking off the boot gasket for another reason, but I'd like to try the brake spring plier instead of the expensive dedicated tool. Could you give a quick explanation of how you made the necessary modifications to your pliers? Looks like you added a bit of a hook to each side--how'd you do it?
Thanks!
|
|
|
|
|
|
Rank: Member
Groups: Registered
Joined: 12/16/2010(UTC)
Posts: 12
|
Originally Posted by: jhhender Thanks, really helpful tutorial!
I'm taking off the boot gasket for another reason, but I'd like to try the brake spring plier instead of the expensive dedicated tool. Could you give a quick explanation of how you made the necessary modifications to your pliers? Looks like you added a bit of a hook to each side--how'd you do it?
Thanks! I bought one of these for $7 at the local auto supply store.... http://www.amazon.com/Performan...d=1335307603&sr=8-23...then bent the tips and ground them to a point like this.... 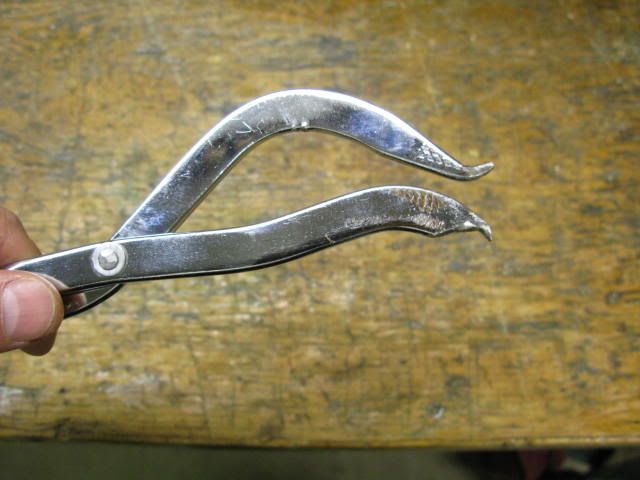 It is a bit awkward to use - you have to pull the handles apart rather than squeeze them together to spread the spring, but it did the trick for me. Good Luck!
|
|
|
|
|
|
Rank: Member
Groups: Registered
Joined: 4/25/2012(UTC)
Posts: 2
|
You saved me big money. I called for service but they could not come until tomorrow. With time to kill I got on the internet and found your information. The pictures, advice on spring tool and instructions made the job go smooth.
Thanks Again.
|
|
|
|
|
|
Forum Jump
You can post new topics in this forum.
You can reply to topics in this forum.
You can delete your posts in this forum.
You can edit your posts in this forum.
You cannot create polls in this forum.
You can vote in polls in this forum.
Important Information:
The AppliancePartsPros.com uses cookies. By continuing to browse this site, you are agreeing to our use of cookies.
More Details
Close