Check whether I received the correct ice maker, and why it will work with no wires

Brand: Whirlpool
Model Number: MBF 1956 KEQ
Main Symptom: water on the floor
What happens & when: My refrigerator is about 15 years old. For the last several years, I have not used the ice maker. Occasionally in the last 2 years, when I pack the freezer too tightly, the refrigerator stops cooling while the freezer continues to work just fine. When I had my main circuit box replaced, and the power was cut off for about 10 hours, the refrigerator magically started working again. Last week, for about the 4th time, I loaded most of the freezer food into coolers and turned off the power for 9 hours. Again, the refrigerator was restored to working condition. But this time, the kitchen floor started flooding. After mopping up the water, I walked the refrigerator out of its alcove and found no problem with the water input. The rear of the alcove, where the water feeds into the refrigerator, was dry, and the water connections were secure. I learned that cutting off the water input was the only thing that would stop the flooding. So, I inferred that the water control valve in my ice maker had gone bad, and I needed to replace my ice maker. I still don’t understand how the water gets from the ice maker onto the kitchen floor. The ice cube tray remains completely dry.

I tried an experiment: I turned on the water supply for about 3-4 minutes, while I stared at the ice maker, first with the control arm up, then with the control arm down. I was looking for anything having to do with water flow. Nothing happened. I knew that would cause water to flood the kitchen floor again, but it was a relatively small amount. The notable thing was that the flooding took roughly 40 hours to appear, after the experiment.

I ordered an ice maker from AppliancePartsPros.com. The email says Part #:
AP4135008 (D7824706Q). The tag on the part that I received says W10190978. Your customer service confirmed that it was the correct ice maker for my refrigerator. However, I watched some YouTube videos about replacing it. They show a wire harness coming from the back of the refrigerator and connecting with one on the back of the ice maker – the same end of the ice maker where the water input feeds in through a collar. The replacement ice maker that I received has no visible wires. I’m not sure how it could connect electrically with the refrigerator. One other thing makes me suspicious: The existing ice maker has a nice, flat front panel with a small logo, while the front of the part that I received has a ratcheted dial labeled DO NOT ROTATE MANUALLY. Also on the front of the replacement ice maker are 6 more or less randomly placed hollow, round protrusions, sticking out about 1/8 inch, each one labeled by a different capital letter.

The freezer is a pull-out drawer, at the bottom of the refrigerator, not a top freezer like most decent refrigerators have. Therefore, replacing the ice maker will be torture. I certainly don’t want to pull out the existing one, only to find that I have to immediately re-install it.

Please explain how the part that I received could be the correct one, even without any visible wires. Assuming that I try using it, do you think the front of the replacement should be hidden behind the existing flat front panel, which would make the installation process even more difficult? Also, if you have any insight as to how the water could be getting from the ice maker to the kitchen floor without ever entering the freezer, I’d love to hear about it.

Error Code (if any):
Parts or tests already tried:
Photos / video link:

Hi, first let’s start with the water on the floor. Since you said you packed your freezer and it was working fine but the refrigerator wasn’t getting cold, it sounds like the freezer froze up and wasn’t able to pass enough cold air into the refrigerator section.

When the freezer is packed too tightly, it can restrict airflow around the evaporator and evaporator fan. Frost and ice can build up and eventually prevent the fan from properly circulating cold air between the freezer and refrigerator.

When you turned the unit off, all that frost and ice melted and drained down into the drip pan. If there was a lot of ice buildup, the pan can overflow, which would explain the water you found all over the floor. I’ve seen this happen quite a bit.

Now, for the ice maker, can you send me the part number that is printed directly on the ice maker itself? That will help me make sure we’re looking at the correct one.

To answer your question: The flat front panel of my existing ice maker has the number 12685007. For the one that I ordered, the email says Part #: AP4135008 (D7824706Q). The tag on the part that I received says W10190978.

The first, large flooding might be explained the way you said. But it kept flooding for a full day after I powered up the refrigerator, until I turned off the water supply. Now it floods again, whenever I turn the water supply back on. Not immediately. As I described in the paragraph about my “experiment”, I turned on the water supply for about 3-4 minutes, and roughly 40 hours later the (much smaller) flood appeared on the floor. As long as the water supply is turned off, the floor stays dry.

That is why I’m convinced that the problem is somehow associated with the ice maker. The obvious solution is to replace the ice maker. But I think I received the wrong one.

On the other hand, I don’t see any water in ice cube tray, or anywhere else in the freezer. So that suggests that the problem has to do with how the water supply feeds into the refrigerator. But as I said in my post, I carefully checked the back of the unit. All connections secure, and when the flooding occurred at the front of the refrigerator – actually front left, the same side as the icemaker, the floor at the back was completely dry.

Hi, yes, these are the same type of modular ice maker. The numbers are just used differently.

12685007 is the manufacturing/model number stamped directly on the ice maker itself, while W10190978 is the part number used to order the replacement.

So if your original ice maker is stamped 12685007, you can replace it with W10190978. That part number has also been updated over time and may now show D7824706Q as the replacement.

Hi, just a heads-up when ordering the updated ice maker: it may arrive as a bare modular unit, so you’ll need to transfer a few parts from your old ice maker.

Remove the plastic front cover from the old ice maker, then transfer the existing wire harness and shut-off arm over to the new one. Once those parts are swapped over, you should be able to install the new ice maker into the refrigerator.

Thank you! That answers my questions about the replacement ice maker. I hope it’s obvious how to transfer the wire harness and shutoff arm from the old ice maker to the new one, because the videos I’ve seen don’t show that transfer.

But how about the flooding diagnosis? Do you think that replacing the ice maker will solve the problem? My uneducated reasoning is that the flooding must be caused by a bad water control valve in the ice maker. Does that sound correct?

Just to review, the water connections on the back of the refrigerator look good, the floor at the back of the unit stays dry, and so does the ice tray and the rest of the freezer. I don’t understand how the water gets from the water supply to the floor in front of the refrigerator. But I know that it only floods when the water supply is turned on, and it takes about 40 hours to get to the floor.

You’re welcome! I would take the back panel off the refrigerator, then turn the water supply back on and watch closely to see if you can tell exactly where the water is coming from. Check around the water inlet valve, tubing, and connections for any dripping or spraying. Once you find the source of the leak, let me know what you see and we can go from there.

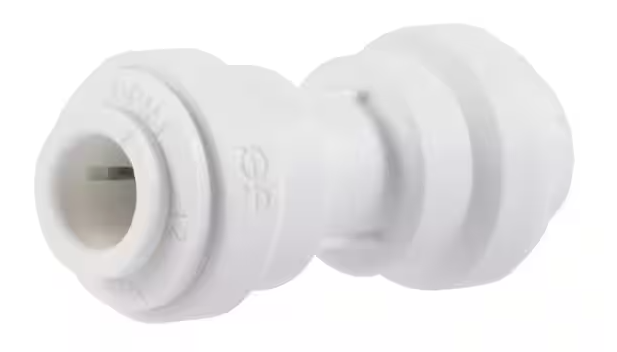
I pulled the refrigerator out its alcove again and was about to remove the back panel. But before I did, I thought I would turn on the water supply and see what I could see. When I returned to the refrigerator, a pinhole leak in the water line was spraying water at my knee. I tried sealing the leak with white Teflon plumber’s tape covered by duct tape, but the water found its way past the tape. So, in two plumbing forums I asked how to seal the leak and came up with a recommendation to cut out the leaking section of the line and replace it with either a barbed connector or a John Guest union coupling. In one forum I was told that the barbed connector was better for this application. I ordered the barbed connector, but it turned out that the 1/4-inch barb was too big to fit inside my 1/4-inch plastic line. So, I ran to Home Depot and was fortunate to find the very last 1/4-inch John Guest union coupling that they had in stock. It worked great! No more leaks, and I was able to confirm that the original ice maker still works – no need for a replacement.

At some point, I’ll consider replacing the entire water line. But it’s not easy to do, because it runs from under my kitchen sink, down through the basement, and back up to the refrigerator.

Hi, awesome! I’m glad you were able to find the leak. Instead of replacing the entire line, I would suggest cutting out the section where the hole is and using a SharkBite fitting to connect the two ends back together. It’ll be much easier and save you from having to replace the whole line.

Here’s what I used: