|
|
Hello Jemesaf,
This particular control assembly has to come out of the front after removal of the the overlay. You will have to be terribly careful in doing so since the overlay has been discontinued and it is adhered to the control panel with super sticky stuff. To aid in the removal, heat the assembly with a hair dryer to as high a temperature as you can tolerate to handle. This will make the sticky stuff let go a bit easier. When re-assembling, you can use double-sided tape to aid the overlays' adhesion. Do not superglue it since the next repair will be adversely affected by the super glue.
|
|
|
Jerry,
Thank you for the reply. I tried what you suggested, but ended up giving up on this for a while. I want to try again and replace this control panel, as it is getting worse. As I mentioned in my original post, the control panel does not appear to be removable (snap out) from the back, and it is too large to slide out from the front. I really cant figure out how to remove this without physically damaging the escutcheon. Do you have any other thoughts on this. Please take a look at the attached images:
|
|
|
Originally Posted by: jemesaf  I purchased the replacement switch for this compactor - p/n: 9871766. I can't figure out how to get it installed. It appears as though it should push out from the front, but there is an escutcheon (p/n: 9871752) preventing it from pushing out. There is no way for it to be removed from the back. The escutcheon does not attach with screws - perhaps it is glued, but that would make it really difficult to replace the switch. Anybody ever replace one of these? 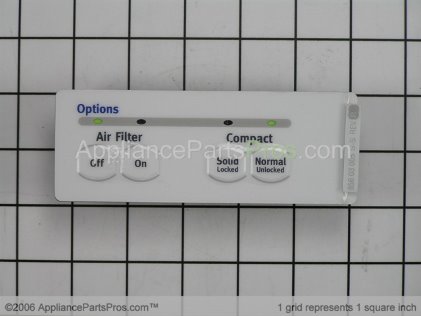  The Switch (#18) does not fit through the cutout in (#4). Thanks Hello Jemesaf, Of course the first thing you need to do is dis-continue the power supply to the unit. Then, if you open the compactor drawer and remove the two screws that secure the entire control panel to the front, as long as the unit is pulled out from under the counter top, the panel will slide straight up and off of the machine. This will expose the back of the panel and the wiring to the switch. I never remove the wires without either taking pictures from several different angles with my cell phone or I just transfer the wires one at a time. There are plastic clips that secure the control to the panel. If you unsnap it and let the control panel slide down the harness, you can change out the wires to the new switch one at a time and not have to worry with labeling the wires or taking pictures. You will just remove one wire and install it on the new switch. Then remove the next, and so on. Of course the new switch will snap easily back into position and re-assembly is in the reverse order as dis-assembly.
|
|
|
Originally Posted by: jemesaf I purchased the replacement switch for this compactor - p/n: 9871766. I can't figure out how to get it installed. It appears as though it should push out from the front, but there is an escutcheon (p/n: 9871752) preventing it from pushing out. There is no way for it to be removed from the back. The escutcheon does not attach with screws - perhaps it is glued, but that would make it really difficult to replace the switch. Anybody ever replace one of these? The Switch (#18) does not fit through the cutout in (#4). Thanks Hello Jemesaf, Of course the first thing you need to do is dis-continue the power supply to the unit. Then, if you open the compactor drawer and remove the two screws that secure the entire control panel to the front, as long as the unit is pulled out from under the counter top, the panel will slide straight up and off of the machine. This will expose the back of the panel and the wiring to the switch. I never remove the wires without either taking pictures from several different angles with my cell phone or I just transfer the wires one at a time. There are plastic clips that secure the control to the panel. If you unsnap it and let the control panel slide down the harness, you can re-connect the wires to the new switch one at a time and not have to worry with labeling the wires or taking pictures. You will just remove one wire and install it on the new switch. Then remove the next, and so on. Of course the new switch will snap easily back into position and re-assembly is in the reverse order as dis-assembly.
|
|
|
I purchased the replacement switch for this compactor - p/n: 9871766. I can't figure out how to get it installed. It appears as though it should push out from the front, but there is an escutcheon (p/n: 9871752) preventing it from pushing out. There is no way for it to be removed from the back. The escutcheon does not attach with screws - perhaps it is glued, but that would make it really difficult to replace the switch. Anybody ever replace one of these? The Switch (#18) does not fit through the cutout in (#4). Thanks
|