Customer Support 7 days a week

Welcome Guest! To enable all features please Login or Register.

Notification

Icon
Error

Post a reply
From:
Message:

Maximum number of characters in each post is: 32767
Bold Italic Underline   Highlight Quote Choose Language for Syntax Highlighting Insert Image Create Link   Unordered List Ordered List   Left Justify Center Justify Right Justify   Outdent Indent   More BBCode Tags
Font Color Font Size
Security Image:
Enter The Letters From The Security Image:
  Preview Post Cancel

Last 10 Posts (In reverse order)
Tao's dad Posted: Tuesday, November 12, 2019 7:45:39 AM(UTC)
 
Thanks a ton for adding the pictures back. I'll be tackling this project this weekend since the pump gets here on Thursday!

Cheers!
Tao's dad Posted: Saturday, November 9, 2019 3:57:43 AM(UTC)
 
I looked at this tutorial a few years ago and bookmarked it for the day I might need it. Today is the day but now all the pics are gone. Is there any way you can add them back? I just ordered the new drain pump from you guys and am hoping to swap it out next week.

Thanks,
Ron B
careh Posted: Sunday, August 10, 2014 3:30:33 AM(UTC)
 
I used this very helpful tutorial to repair a LG WM2010CW washer with the OE drain fail code.

As mentioned - it is helpful to label the screws as you remove them so you knew where they came from. Also mark the 3 spots where the pump motor screws are attached to the pump casing as it is easy to get confused when you go to reassemble it. Using a camera makes it easy to 'remember' where everything came from. Putting some masking tape with markings on it on a part is also useful.

The front panel circuit board in this unit required two connectors on the right hand side (black and yellow) to be unplugged in order to rotate it, swing it up and over the top of the machine. The connectors are color coded.... buy boy are there ever a lot of them.

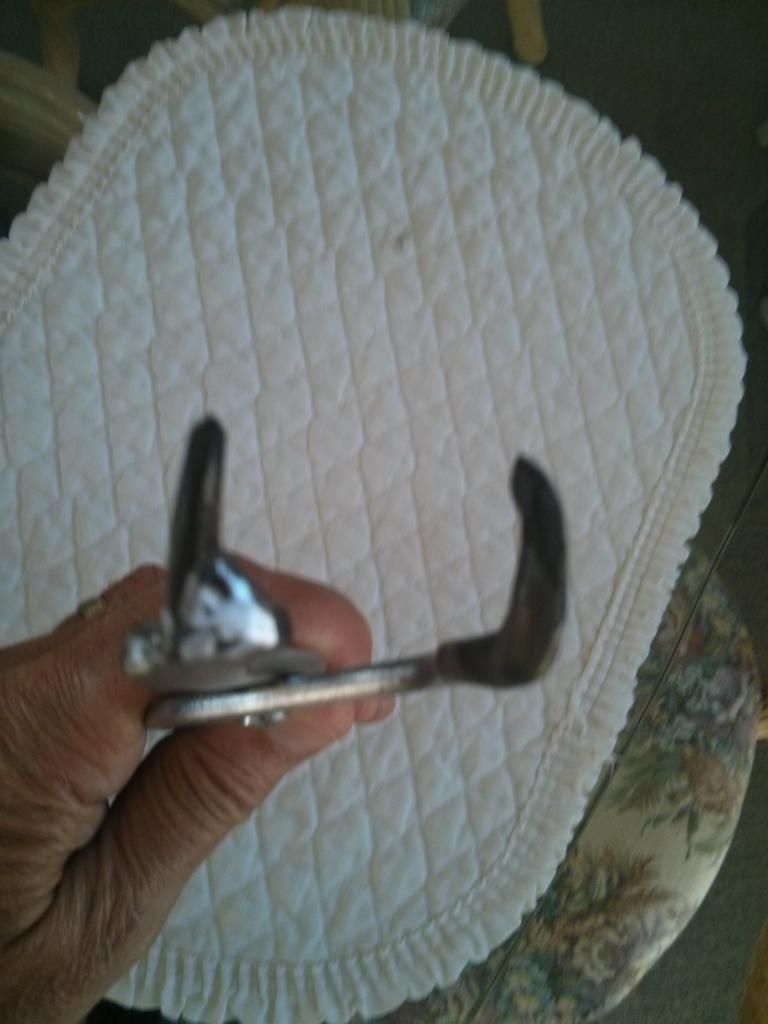
The drum spring removal was easy - however putting it back was more difficult. Thanks to the OP for suggesting the modification of a pair of brake spring pliers for the task. I had my local garage do the modification to it.

There was a lot of black gunk inside the large hose that connects the drum to the pump. This hose has an accordion bellows like construction that is ideal for collecting gunk.

There was also a lot of gunk found after removing the pull out soap drawer.

At the bottom of the door seal is a small drain that was clogged with crud. You can get to the top opening of that drain when the washer is assembled by folding back the door seal. it would be wise to keep that drain clean by regularly cleaning it out.

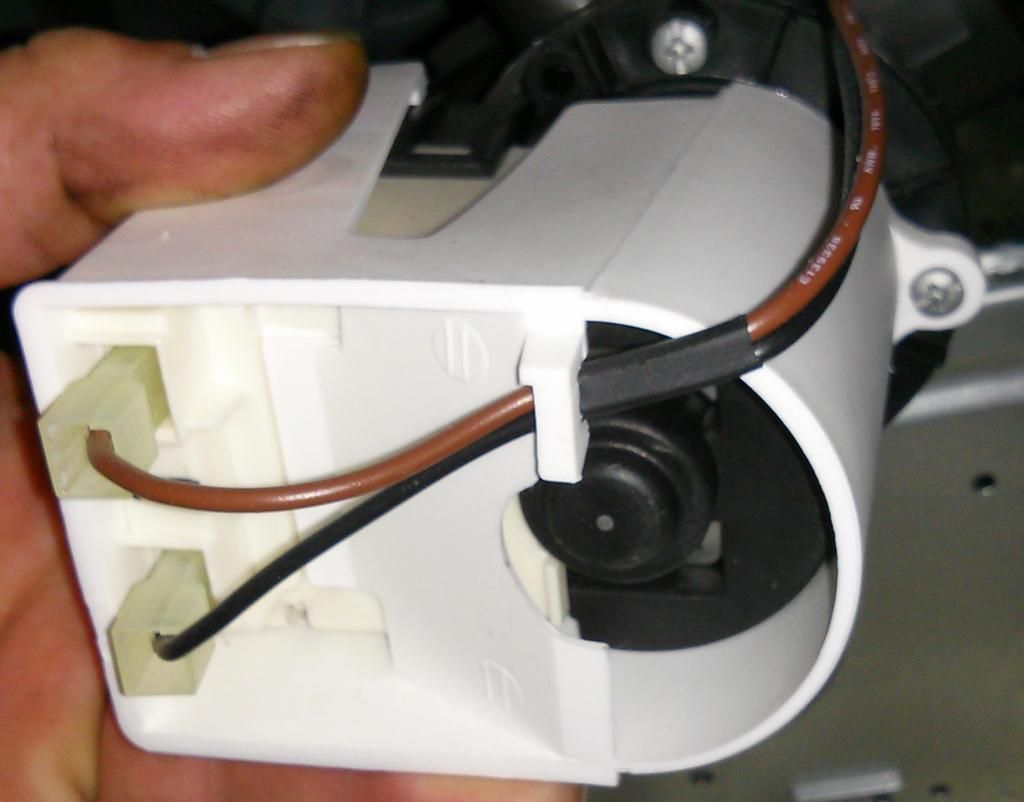
I tested the pump motor for ohms (16) and did a bench test (it ran) - however the end result was that the drain pump water output fluctuated from zero output to a trickle to full stream and only if I held the discharge hose at floor level. Apparently the pump motor was failing so I replaced it. Our local appliance parts store said I could not order the pump motor - as LG did not allow this. This was incorrect as I was able to order the pump motor over the phone from Sears Canada 1-800-665-4455. **Update - It is now Sept 18 and I still don't have the part from Sears - so better to order your part from the USA and have it shipped to a US relative or a broker in a town near the border. I see some sellers on e b a y . c a will ship direct to Canada - that is another route.

UserPostedImage

UserPostedImage
UserPostedImage
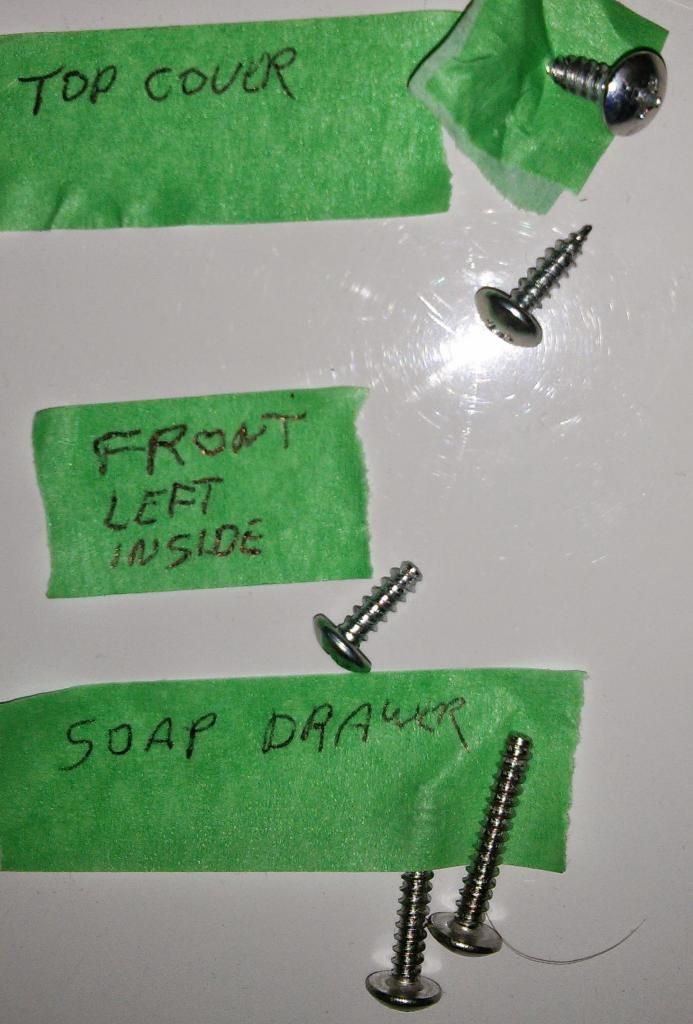
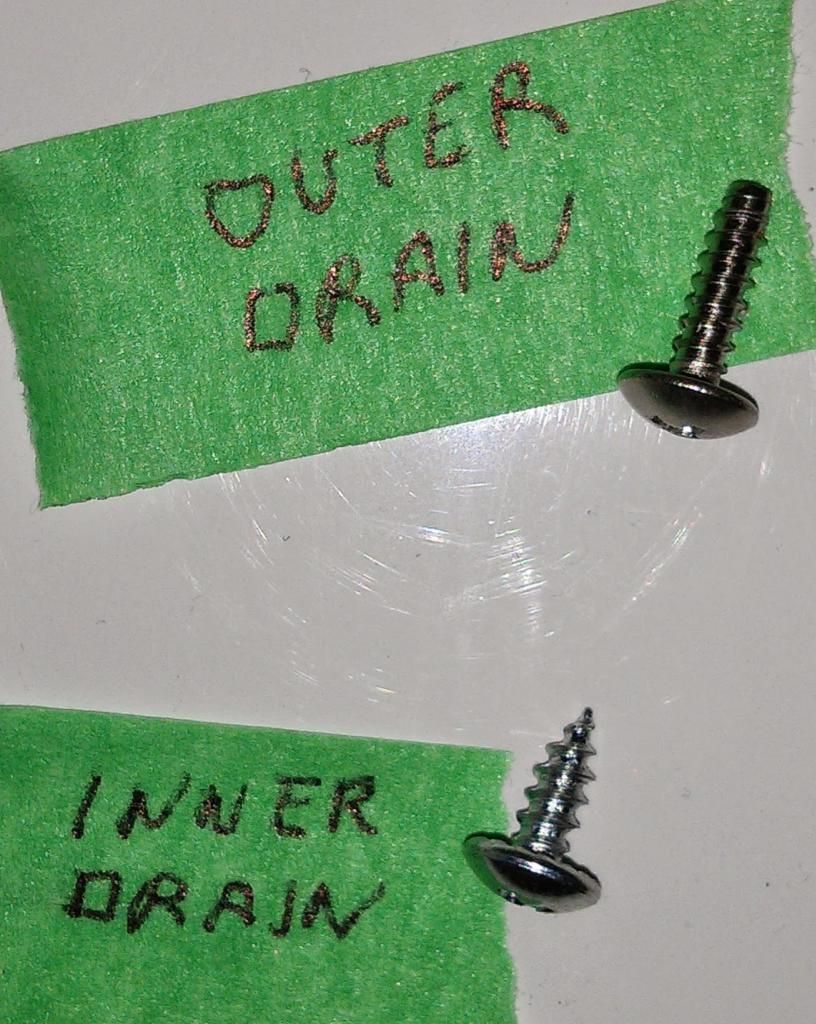
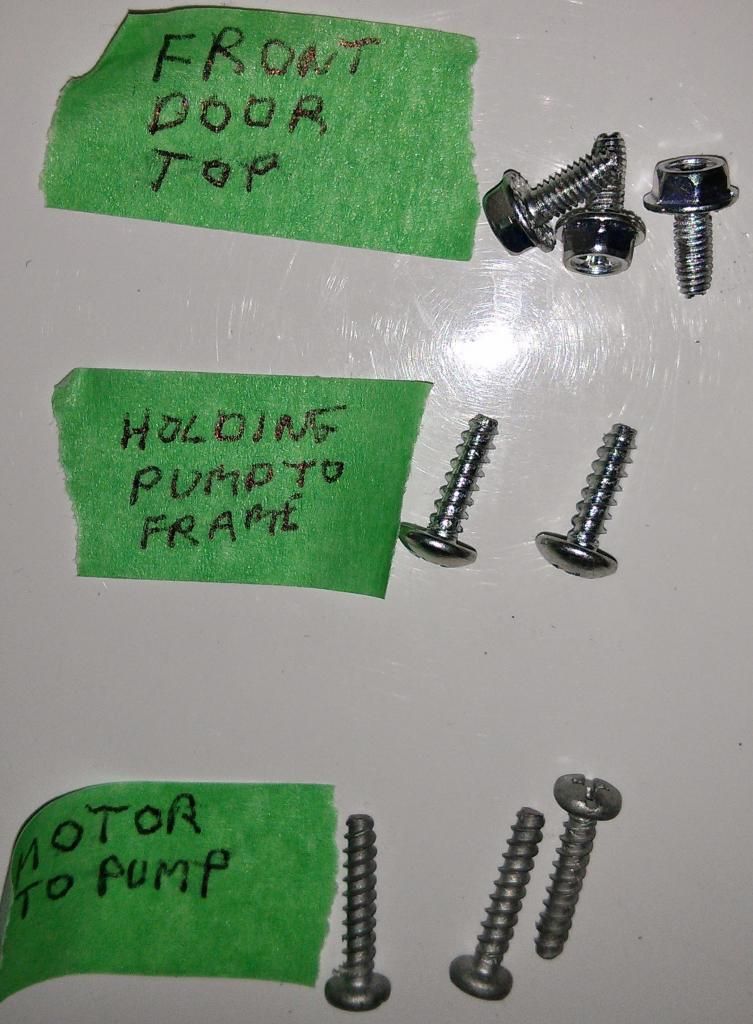
Label the screws as you remove them. They are all different in size.


UserPostedImage
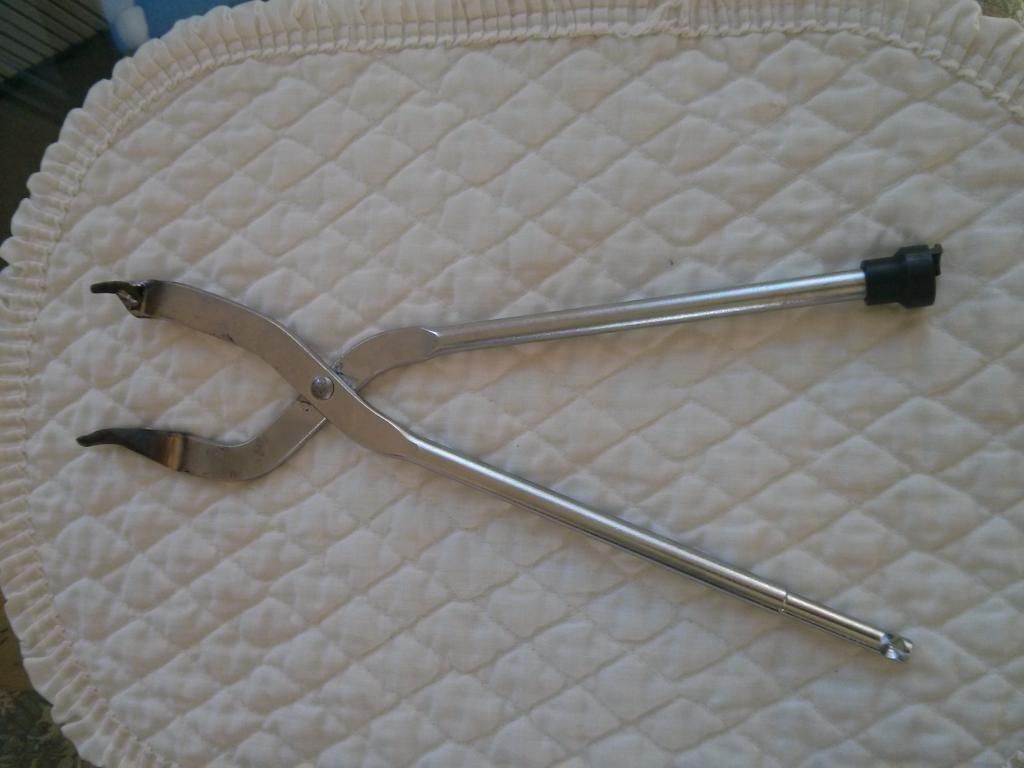
Modified brake spring tool to remove the outer drum seal retaining wire. I had my local garage modify it. Basically you want two right angle 'fingers' that can stretch the outer drum spring to allow the retaining wire to fit over the door seal.


UserPostedImage
Side view of tool


UserPostedImage
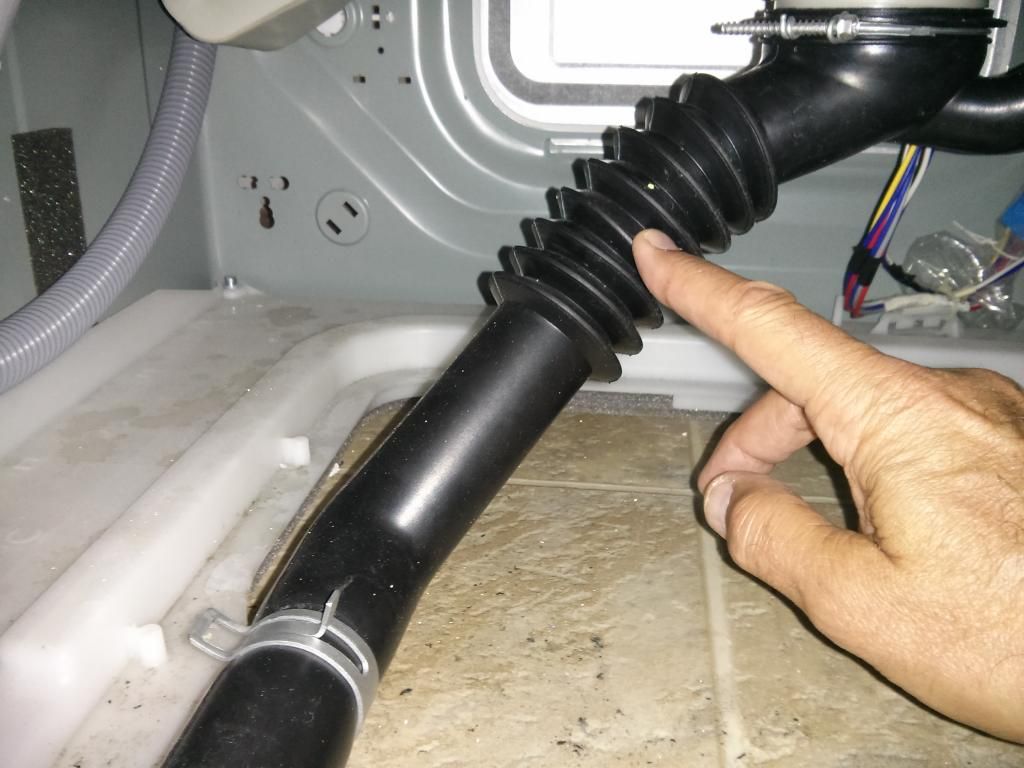
This hose had lots of gunk in it.


UserPostedImage
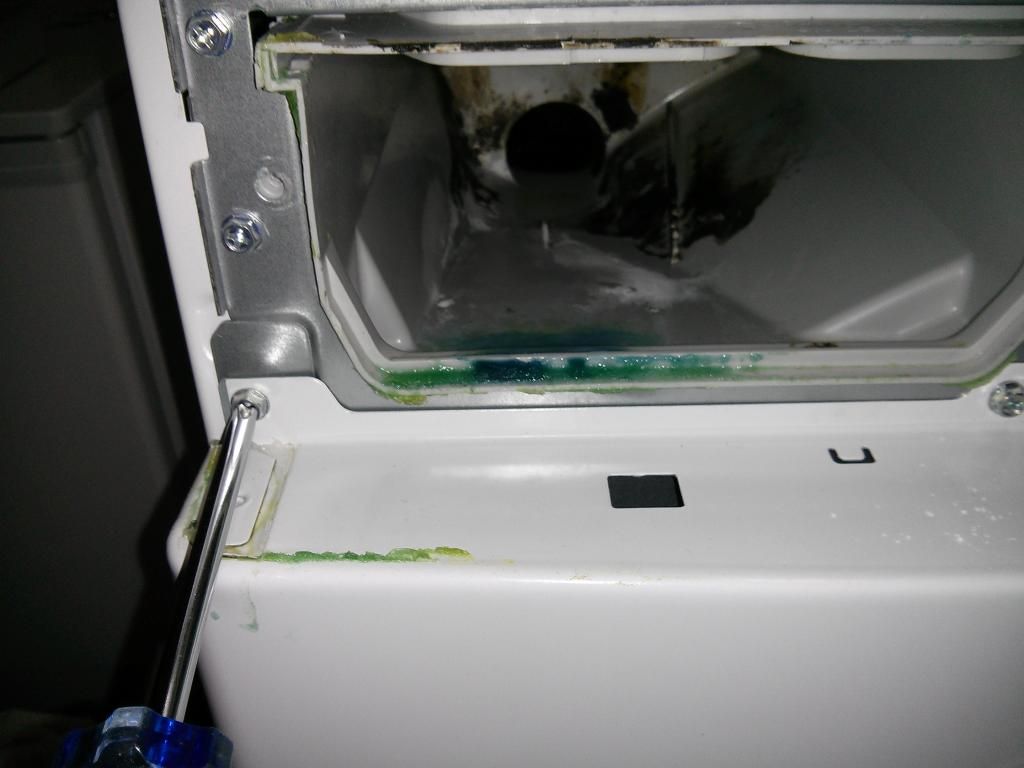
Gunk found once the soap dispenser drawer was removed. On this model the front door assembly is held in by 3 screws along the top front of the door panel plus one screw at the top rear right hand side and a couple down by the left hand pump access hatch.

UserPostedImage
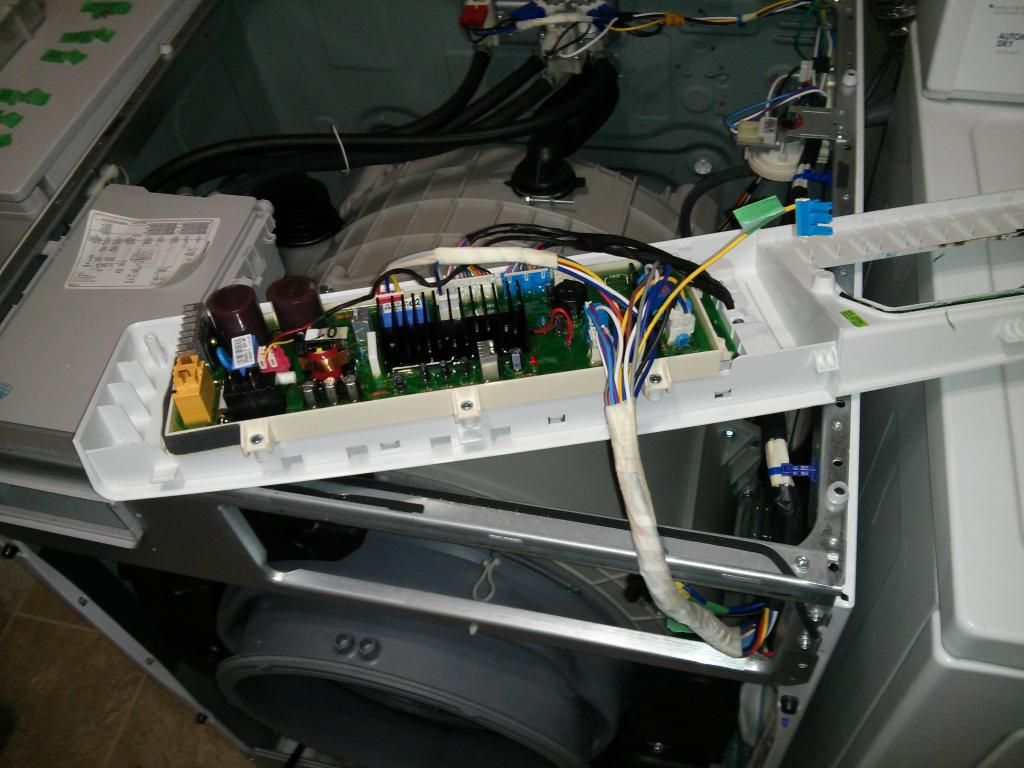
This is the circuit board -rotated and put on top of the washer to get it out of the way. Only the 2 right most connectors (colored black and yellow on this model) need to be unplugged to swing the circuit board above the washer.

UserPostedImage
Taking lots of photos can save you grief when going to reassemble the unit.

UserPostedImage
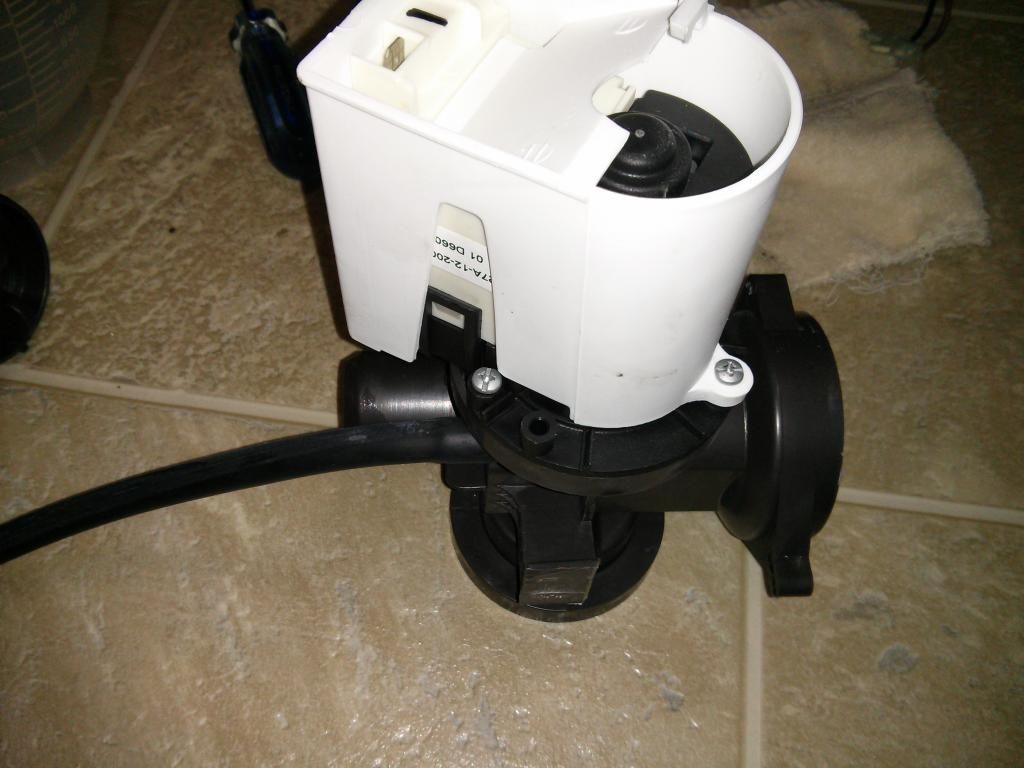
Before disassembling the motor/pump - Mark the pump housing with some masking tape to show where the 3 screws attach the motor. I did not and then had to refer to the photos to determine where the motor attached as it can be put on in many different positions.
[IMG]http://s1237.photobucket.com/user/careh1/library/?sort=3&page=1[/IMG]
richardkook Posted: Friday, December 13, 2013 4:59:57 PM(UTC)
 
I have to replace the pump in my washer. It is a LG Tromm WH2477HW. The pump has 2 black wires, a blue wire, and a brown wire. I was not around when the pump was taken out and I not sure which wires go where. Any information would be appreciated.
wrights5 Posted: Monday, December 9, 2013 11:51:43 AM(UTC)
 
Thanks for the great instructions on how to replace to pump! It saved time and money! My husband wanted to turn the thing upside down to repair!

THANKS!!!
jamescolon Posted: Saturday, November 16, 2013 8:54:36 PM(UTC)
 
This was such an awesome tutorial, very helpful...
but we cant do this with the help of tools.

I have a solution, anyone wants?
FixerVbuy Posted: Saturday, November 16, 2013 4:36:56 PM(UTC)
 
Thank you for this post! Day was the second time I have used your breakdown to repair my equipment, thus saving me hundreds of dollars. But moreover being my wife's hero. This information is a truly a blessing to have.:)
ROB329 Posted: Wednesday, September 25, 2013 10:06:23 AM(UTC)
 
First off, your pictures and explanations were amazing. Thank you very much. When I took the pump out, I think i checked the ohms correctly and its said 16.0 so that is within your spec. I have a problem with my WM2277HS not draining and showing the OE error code. Nothing was really clogged when I blew through the hoses, which make me still think it's the pump. When I pull the outer cover off is the impeller supposed to be able to flop, or is it on a straight solid shaft? My impeller has some play in it and I didn't know if this was normal or part of the design. Suggestions?
denman Posted: Wednesday, September 11, 2013 3:54:21 AM(UTC)
 
I would replace the pump.

Just get your model number and look it up in the parts page of AppliancePartsPros.
THIS FORUM IS DEAD!!!!!!!
jomeza001 Posted: Tuesday, September 10, 2013 5:36:14 PM(UTC)
 
Hi there guys. My wife is out of business as of today because the drain pump on her LG front load washer seems to be fried. I already cleaned it up and lots of built in sediment got out. However it's not working after a good cleaning. So i will pull it off and test it. In the picture it seems like Don has conected the pump to bare extension cable plugged to the 115Volts jack on the house?? Is this correct? I'm about to do this but don't want to short it up.

LMK.

Thanks for this awesome write up. The wife will be very thankful and so all the kids. (yeah, me too).
-Jorge

***edit: I just test it as in the picture and the motor works fie. The problem is in the propeller. it has a lot of play and therefor it fails to keep running. I found out the propeller was not very tight onto the shaft so i tried to press it against the shaft and tested again and it worked. I tried to stop it with my finger while running on my bench and it seemed pretty firm. So i went ahead and installed everything again and test run it. Unfortunately it does not drain! And there is a big noise like if the propeller were hitting something but it's not. The propeller did run good while it was on my bench.

What do you suggest me to look at??